Azure VMware Solution: Connect On-Premises and Azure VMware Solution via ExpressRoute GlobalReach
Use Case
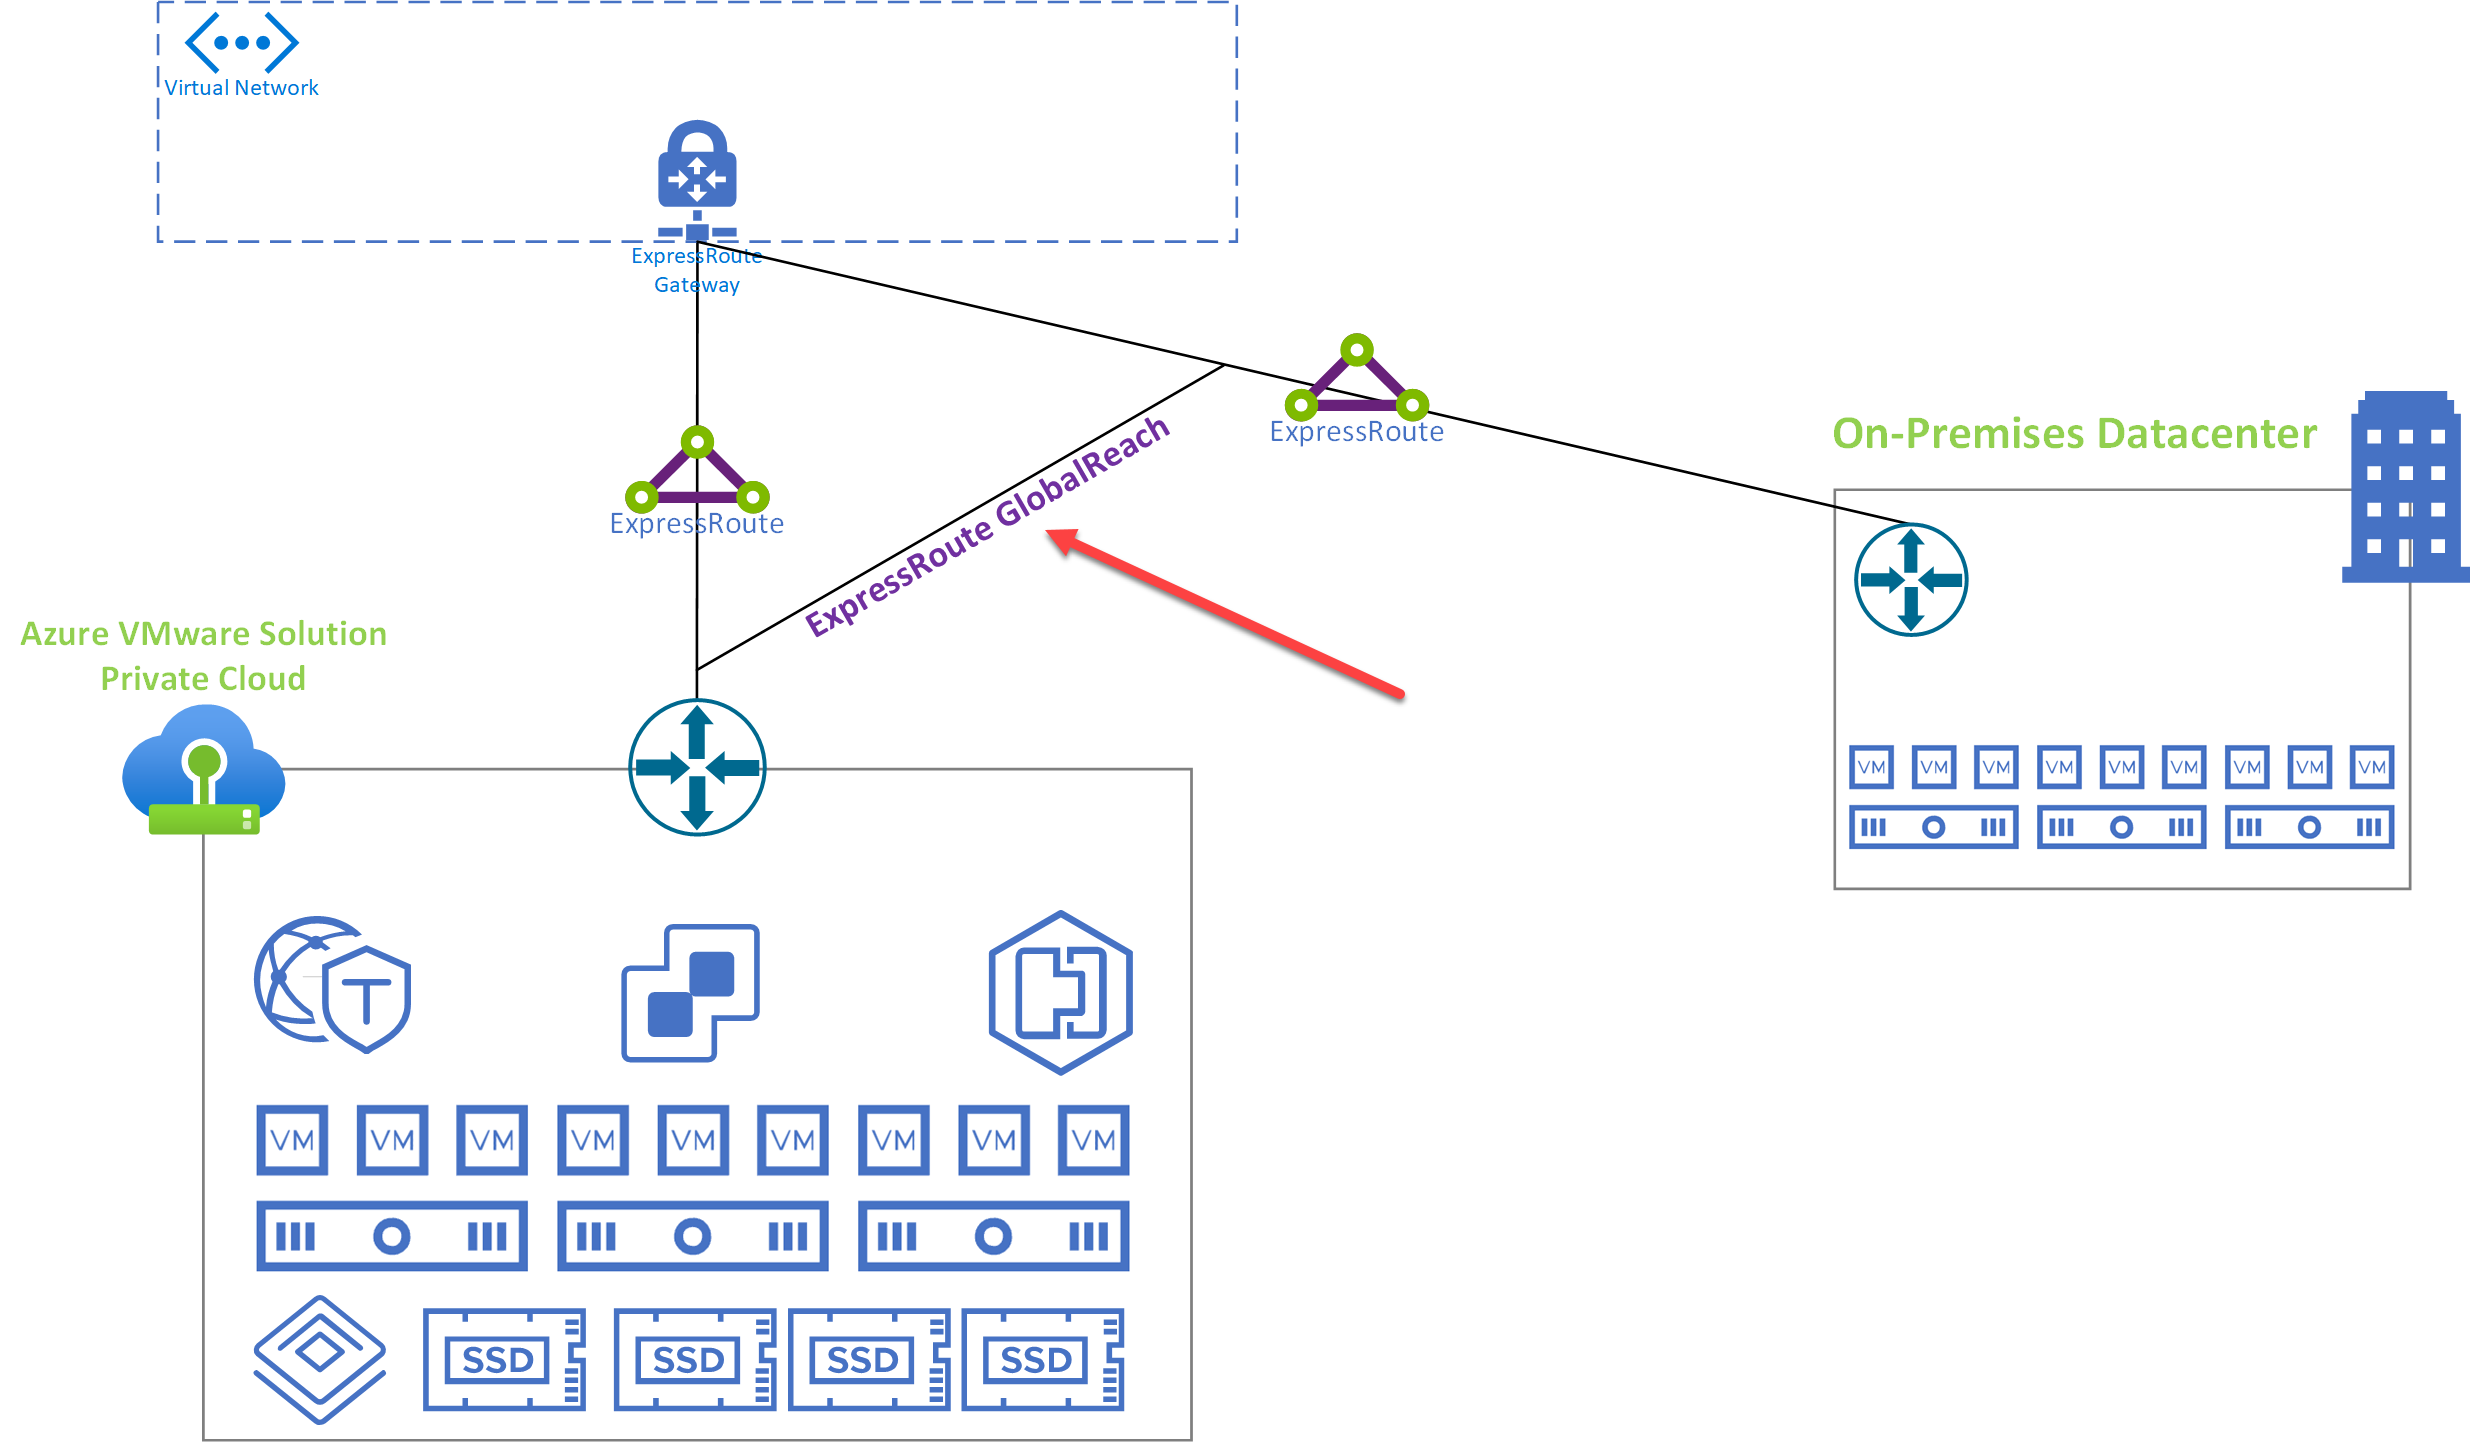
The on-premises environment connects to Azure via an ExpressRoute, and communication between AVS and the on-premises environment needs to be established. The recommended (and simplest) way to achieve this is with ExpressRoute GlobalReach.
General Information
- The ExpressRoute GlobalReach connection is bundled part of the private cloud cost.
- If there are multiple on-premises locations connecting with an ExpressRoute multiple Global reach connections can be established.
- This graphic shows both the on-premises and AVS ExpressRoutes connecting to the same ExpressRoute gateway, but that is not a requirement.
- When this connection is established AVS will learn all the routes being advertised from on-premises and on-premises will learn all the networks which are part of AVS.
- There are automated deployment options in-lieu of doing the manual steps outlined below;
Implementation and Configuration
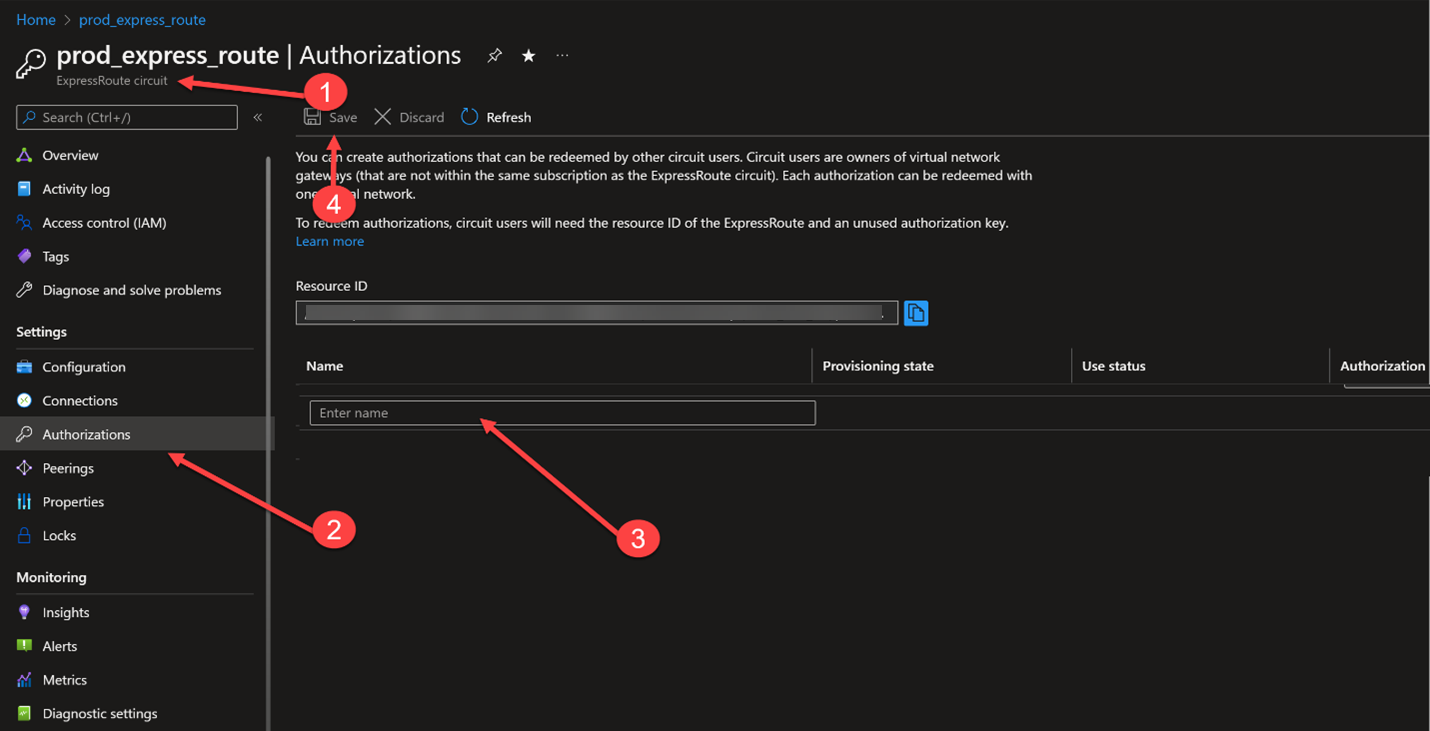
- Navigate to the ExpressRoute circuit which is coming from on-premises. Choose Authorizations, provide a name and press Save. NOTE: Provide a name something like From-<PrivateCloud>.
What is being done here is an authorization key is being generated on the on-premises ExpressRoute which will be used to connect the ExpressRoute Global Reach circuit from the AVS portal.
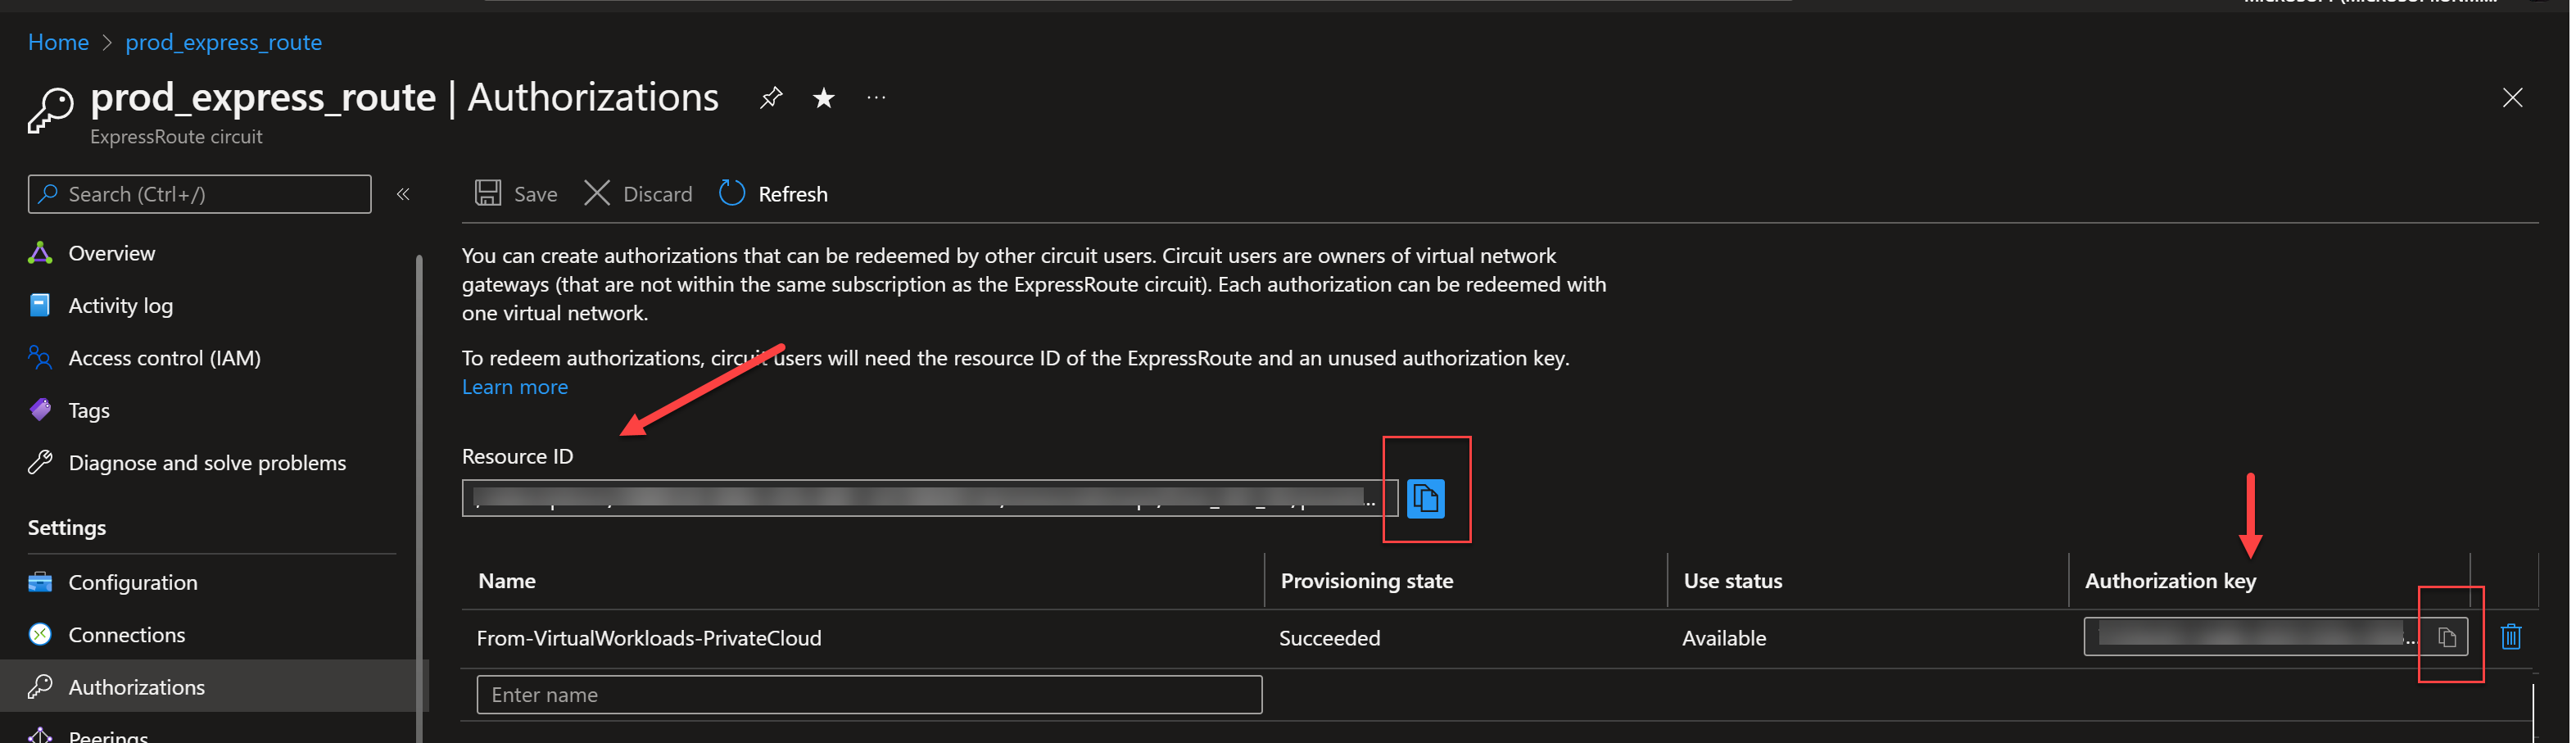
- You should now see a screen like this, copy the Resource ID and the Authorization key. You will need these in later steps.
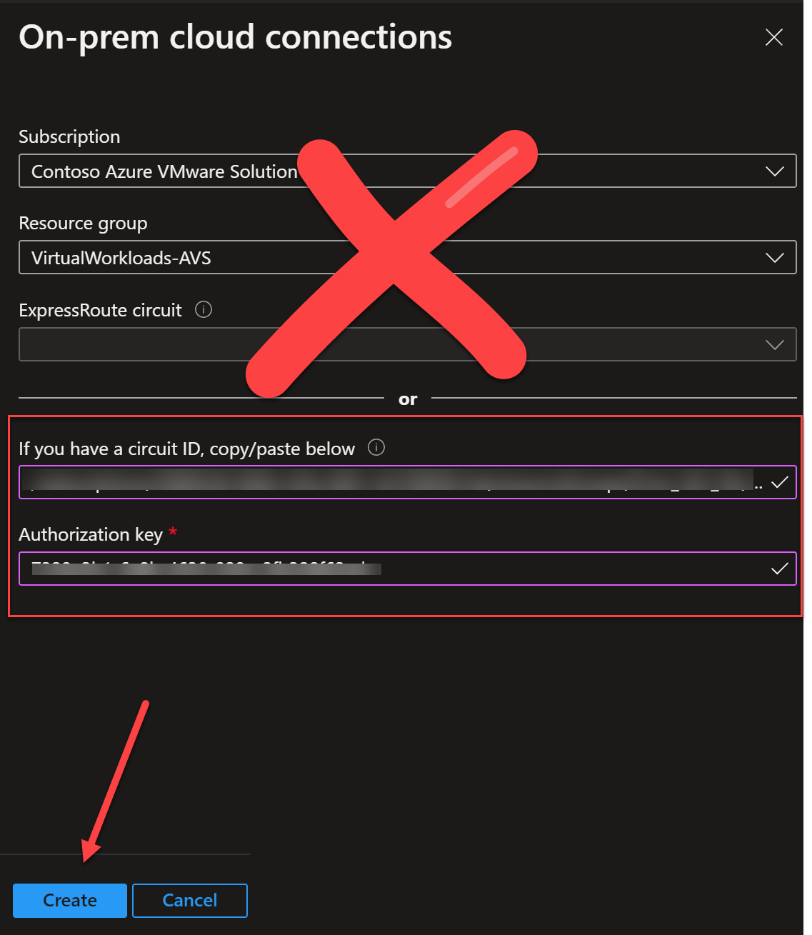
- Navigate to the AVS private cloud, select Connectivity. Then choose the ExpressRoute Global Reach tab and press Add.
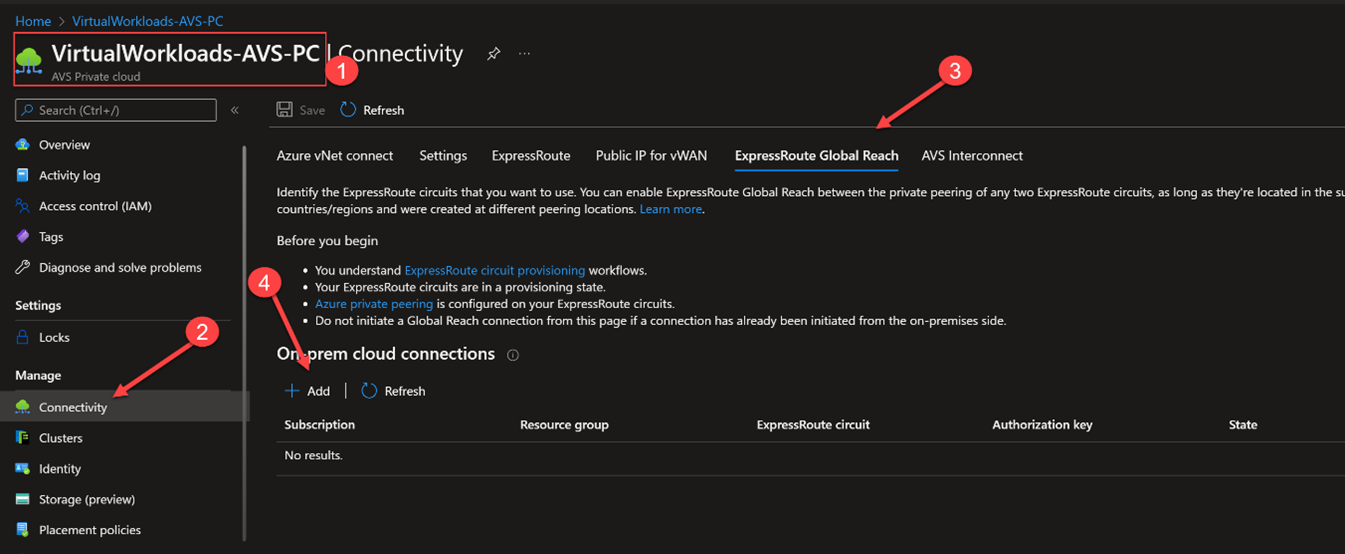
- Ignore the top entry items (the ones w/ the X though it). In the bottom two fields input the Resource ID and the Authorization Key which you created in Step 2.
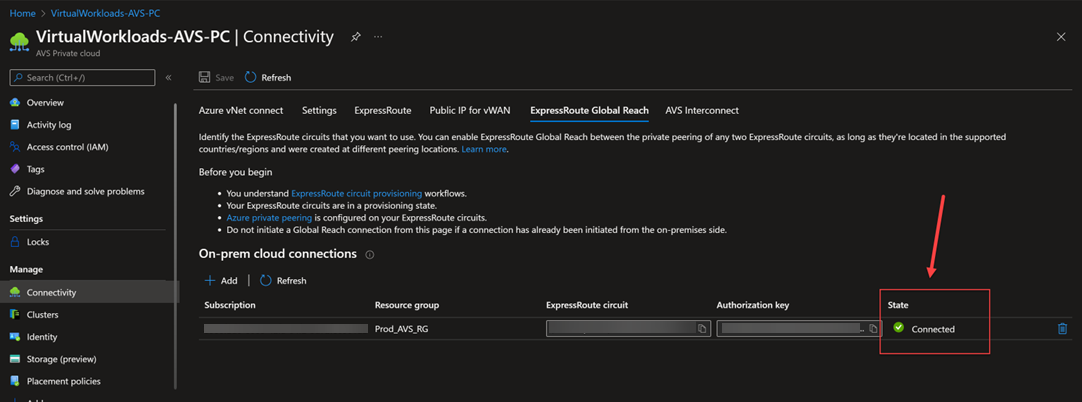
- You should now see the State as Connected. The AVS private cloud and the on-premises environment should now have connectivity.
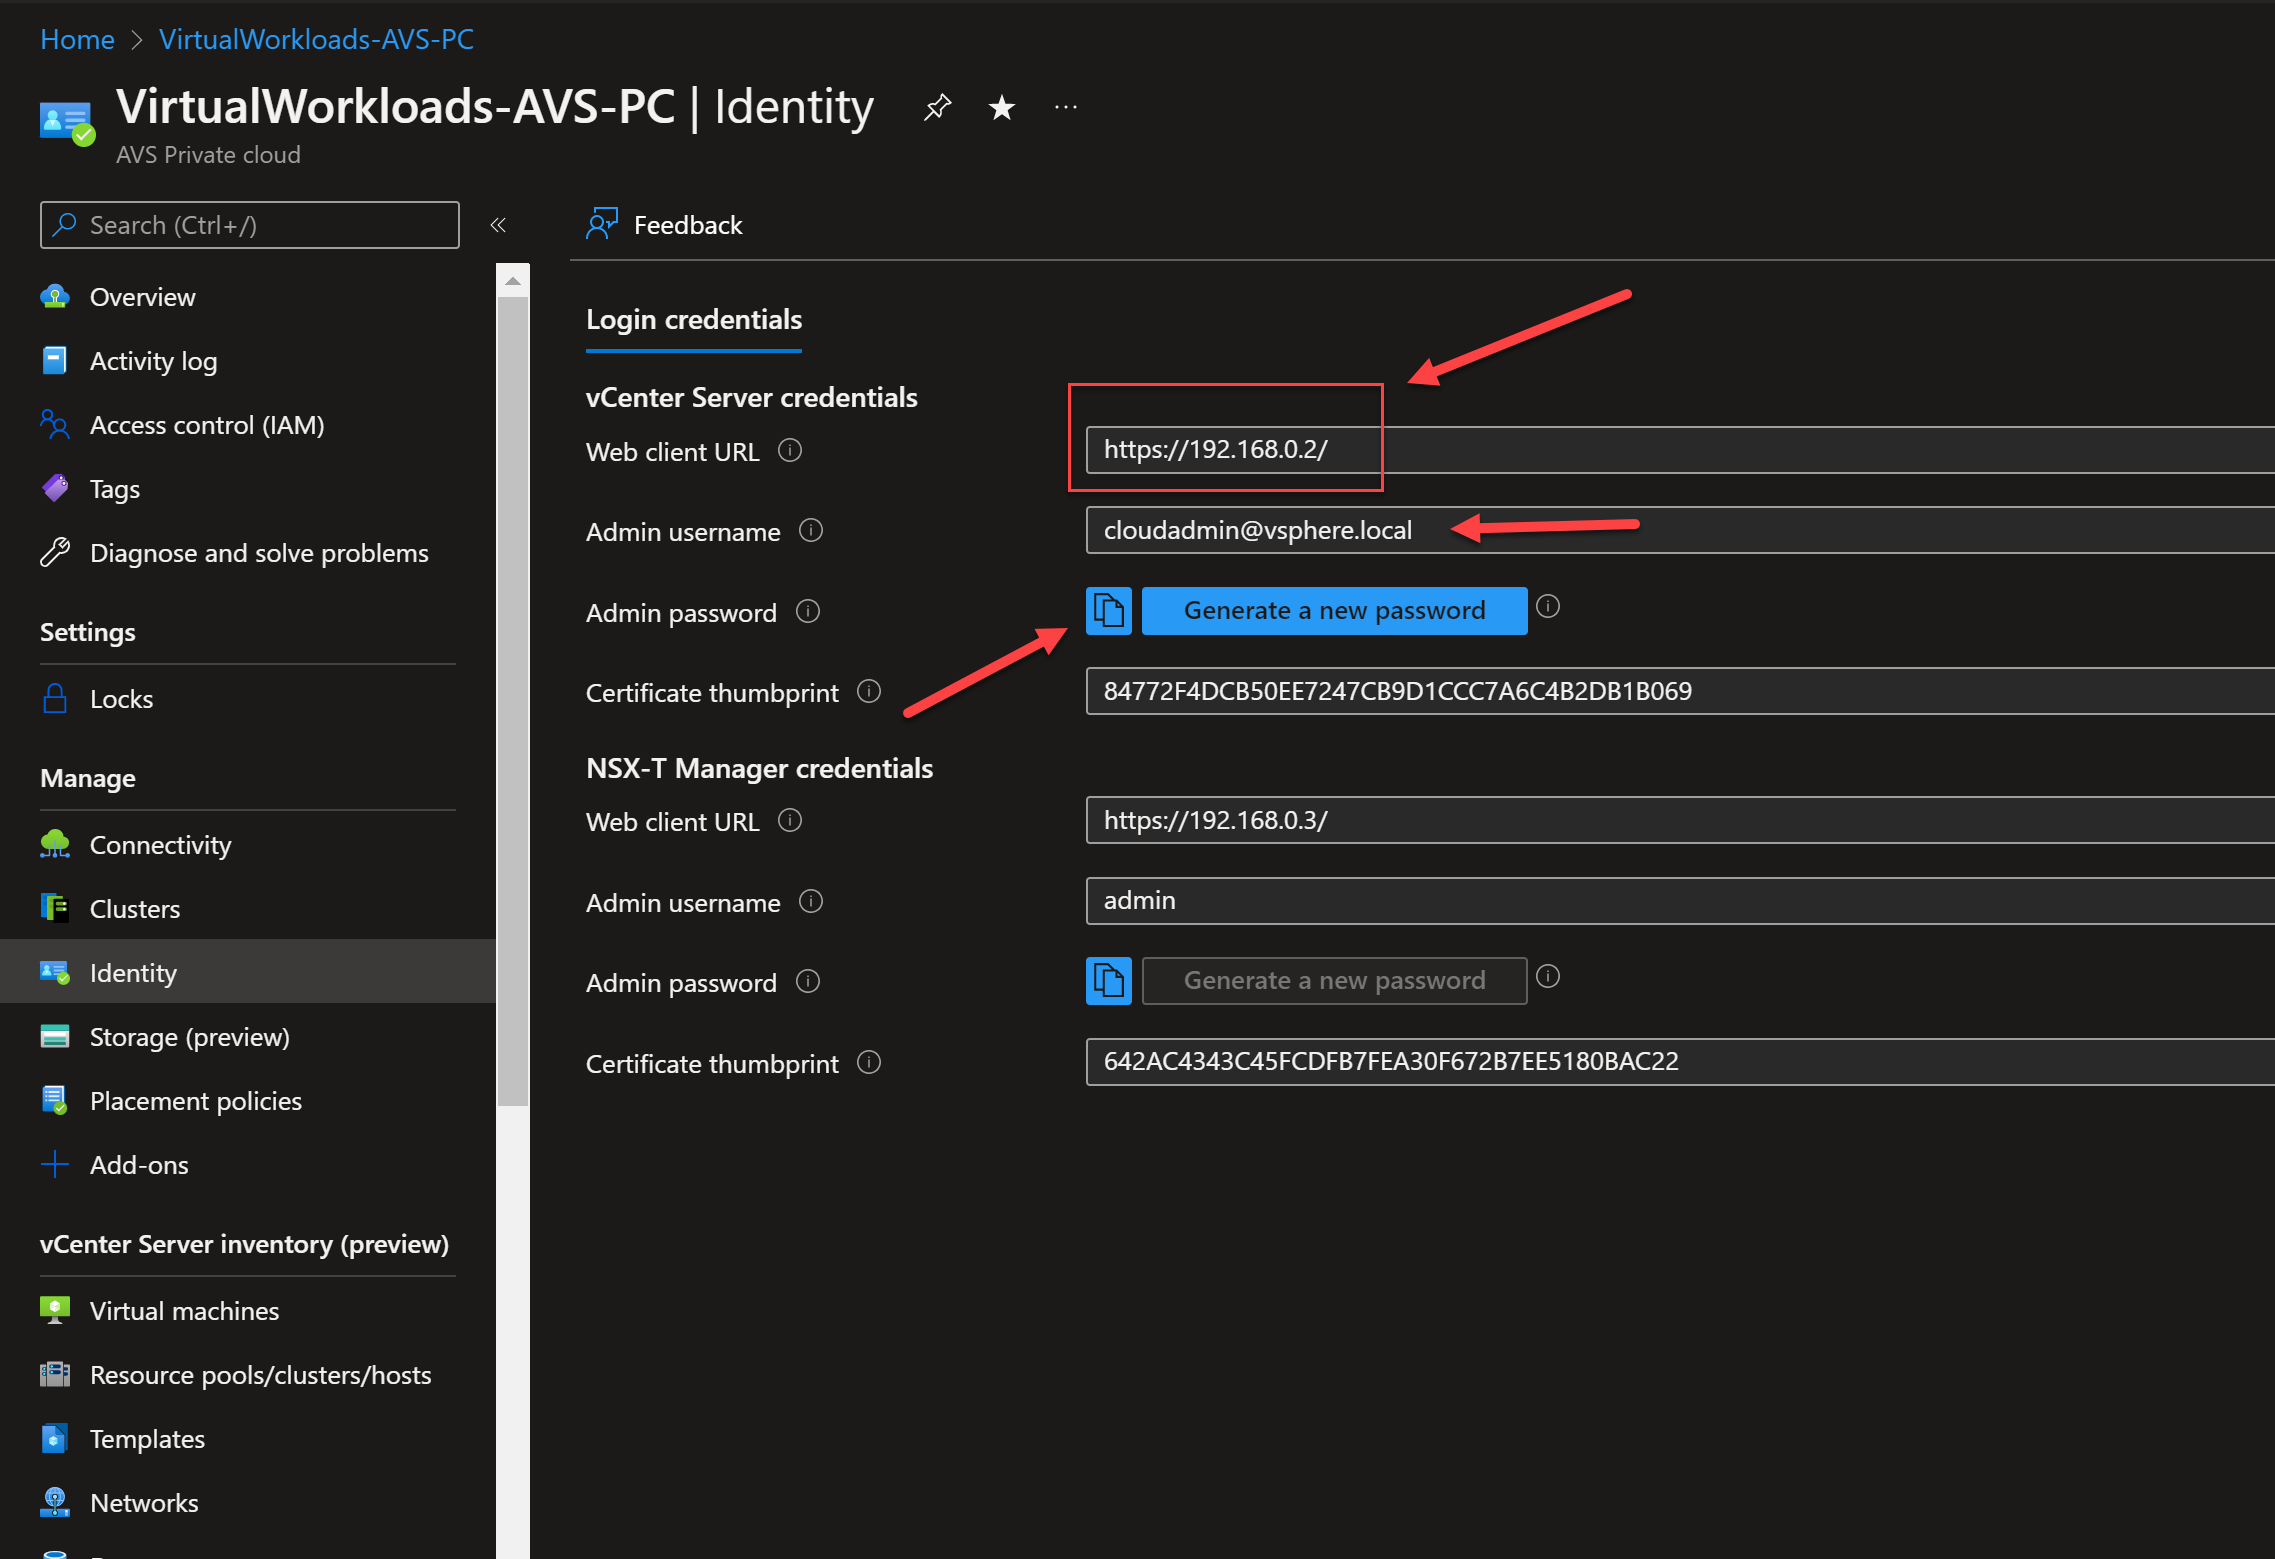
- Navigate to the Azure VMware Solution private cloud and choose Identity. There you will find the vCenter URL, vCenter username and vCenter Password.
Test accessing vCenter from the on-premises environment which was just connected.
NOTE: If there is a firewall securing communications from on-premises to Azure you will need to make sure that port 443 is open to the vCenter IP address.

Azure VMware Solution UserCon Presentation

Access Azure VMware Solution Using Azure Route Server and VMware SD-WAN